Extra Crispy Goose Breast

I like to pluck almost all the birds we shoot. Why? Because I love crispy bird skin. From fried chicken to peking duck, the skin is always my favorite part. Getting chicken skin crackling crispy and golden brown is fairly easy. It’s a little more difficult with waterfowl.
The skin on a wild goose or duck is a lot thicker than chicken skin. It requires a little more attention to get it crispy instead of chewy. I’ve experimented with a multitude of cooking techniques to try to get the perfectly crisp skin that I crave. The best methods I’ve found involve using an air compressor or the peking duck method. While this works great, it’s not very convenient, and it works best on whole birds versus just breasts.
Borrowing from the peking techniques, I’ve found that a combination of scoring, rendering, drying, and basting yields incredible results. It’s a bit of a drawn out process, but I feel that it’s well worth it if you enjoy crispy skin.
This method is spread out over 2-5 days, so plan ahead.

Extra Crispy Goose Breast
Prep time: 3 days inactive
Cook time: 30 mins

Ingredients:
2 goose breasts, skin on
2 tbsp Maltose syrup
1 tbsp soy sauce
Method:
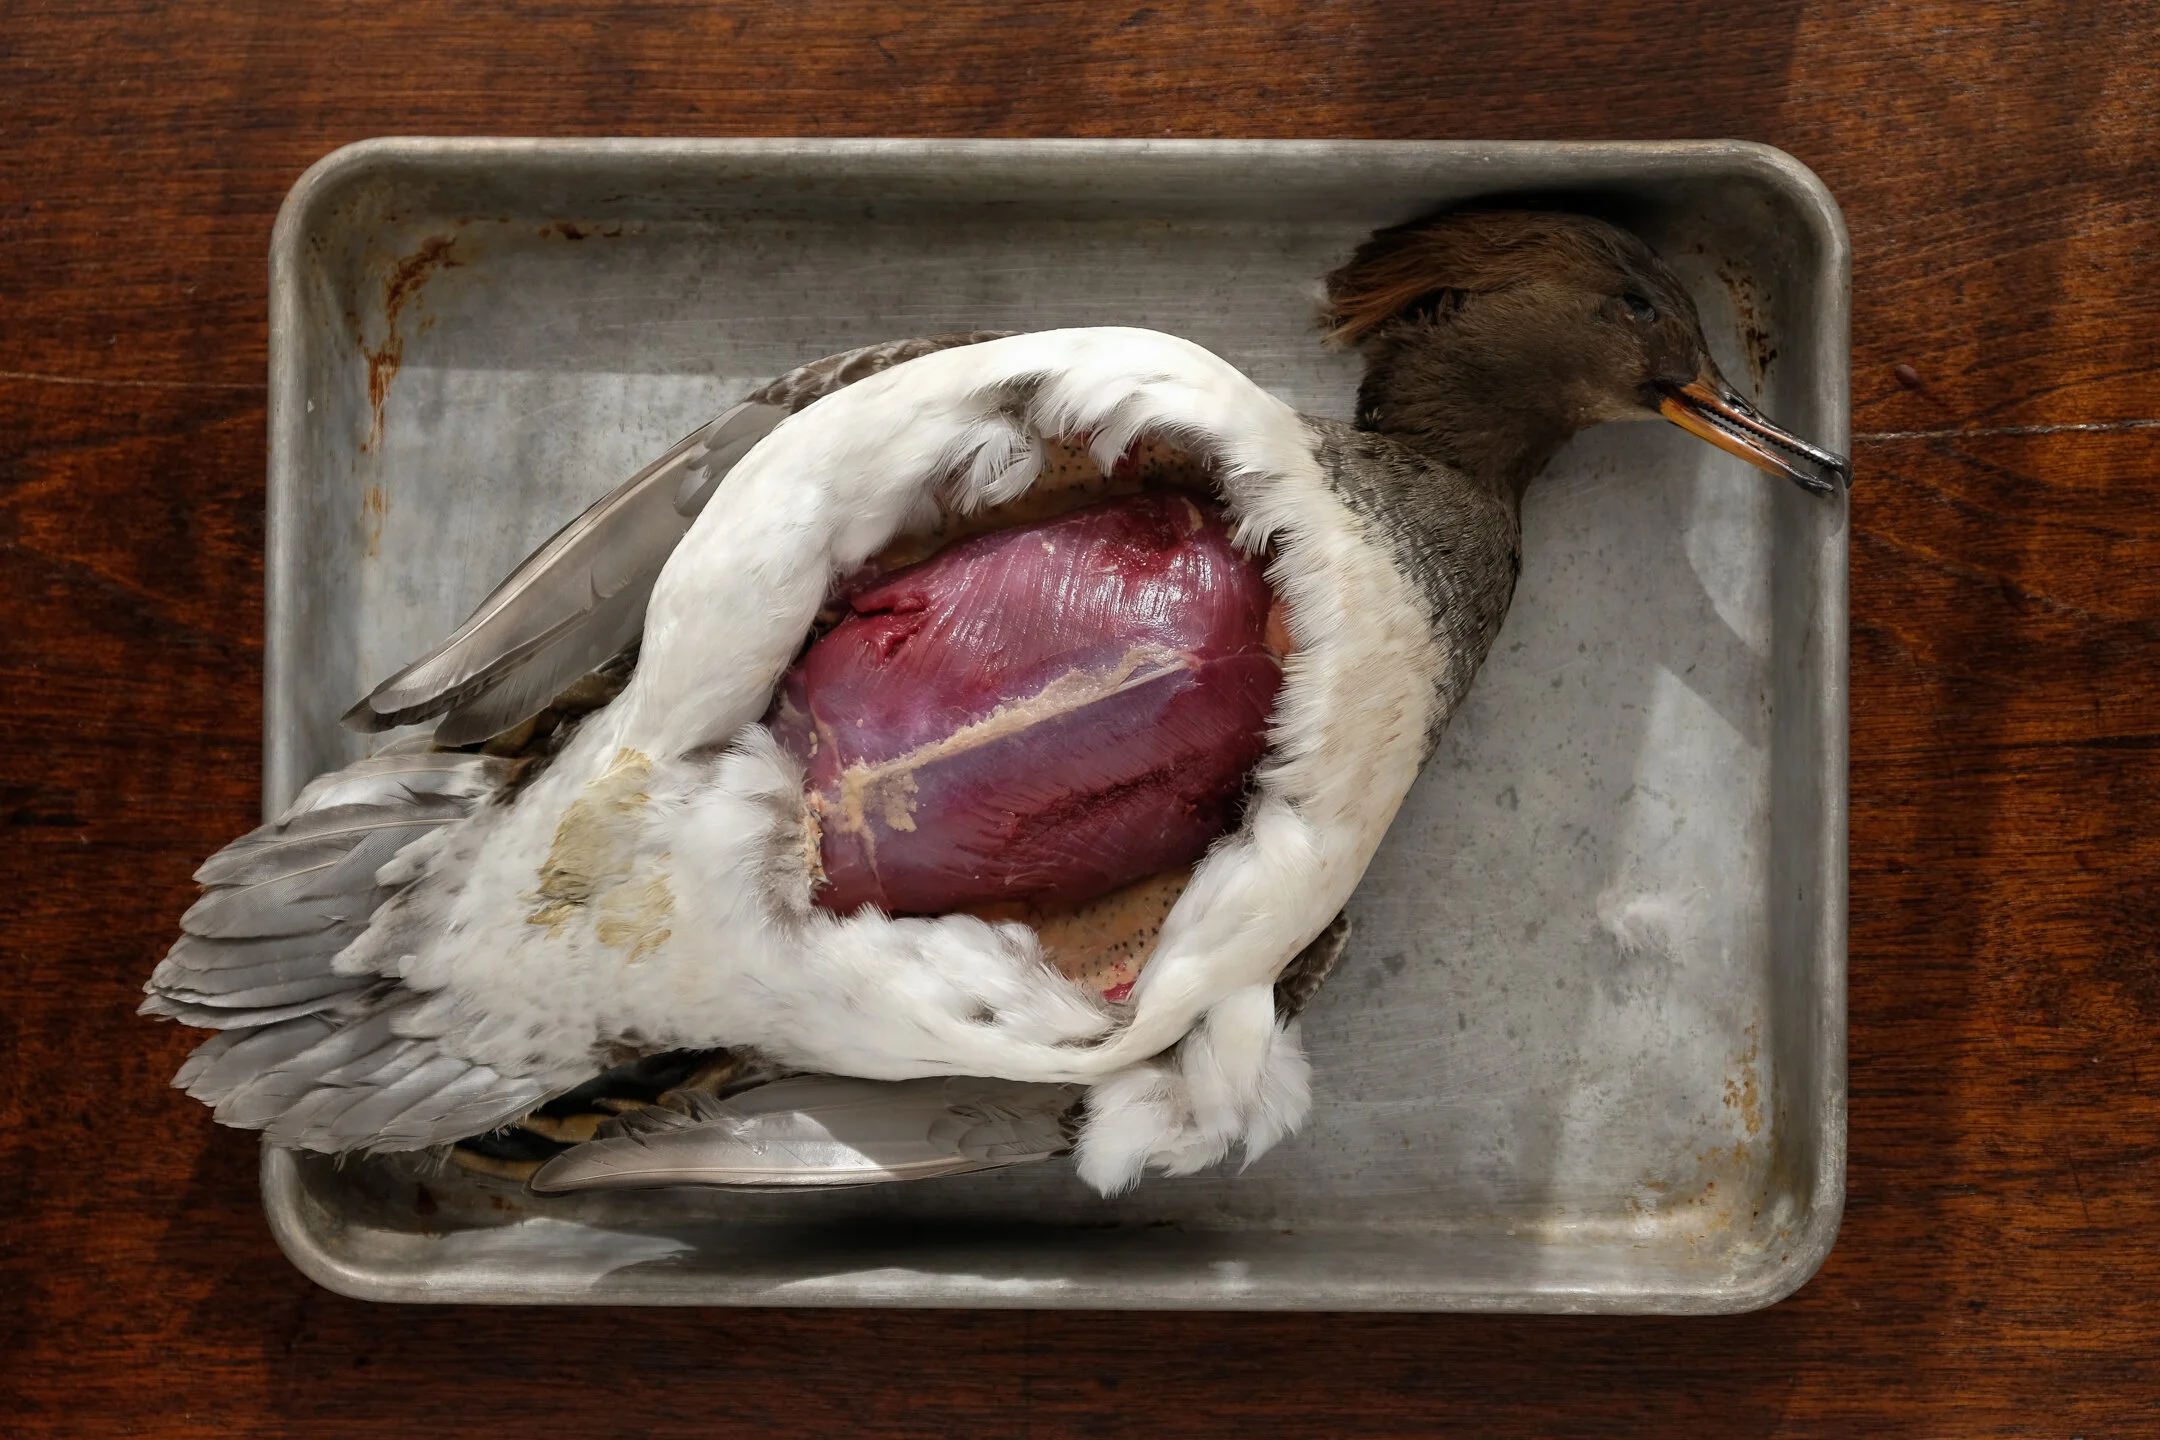
I start by scoring the skin of the goose breasts and seasoning with salt. Put these breasts in the fridge, skin side up, loosely covered, overnight. The salt will draw out a lot of moisture.
Pat the breasts dry, and place skin side down in an unheated pan. Place on a burner on low heat. The goal is to render fat from the skin and remove as much moisture as possible. Cook for 5-8 minutes, using tongs or a spatula to press the skin flat against the pan. Once the skin is looking dry, remove from the pan, and pat the skin side dry.
Mix the maltose with the soy sauce. You will want to microwave the maltose for 30-40 seconds, it’s extremely thick and hard to work with at room temperature. Using a pastry brush, glaze the skin side of the breasts with the maltose and soy mixture. This adds a little seasoning and the sugars in the maltose will aid in getting that extra crispy skin in the end.
Place the glazed breasts in the fridge, skin side up, uncovered or tented to allow air flow over the skin, for 1-3 days. The goal is to dehydrate the skin before final cooking.
When ready to cook, preheat your oven to 350F.
Place the breasts skin side down in an unheated pan and heat on low for 3-5 minutes. Just like the first rendering, you are removing more moisture from the skin. Flip the breasts once they are lightly colored and place the pan in the oven for 5-10 minutes, or until internal temperature reaches 115-120F.
Remove breasts from pan and allow to rest skin side up for 10-15 minutes. In the same pan, heat up about a cup of cooking oil or lard over medium high heat. Once the oil is hot, tilt the pan so all the oil is on the side closest to you, and add the breasts, skin side up, to the raised side of the pan. Using a spoon, baste the skin with the hot oil.
The skin will start to deepen in color and sizzle, it should look like cracklings are forming. Continue basting until all of the skin is crispy. Remove from pan and allow to rest for 5-20 minutes before slicing.
The skin should be CRISPY- running the back of your knife along it should sound like you're scraping a hard material. Cutting through the skin should require a bit of force, but the center of the goose breasts should be a solid medium-medium rare.
You can serve this with just about anything. We like to keep it pretty simple and pair with winter arugula and spicy mustard.