How To: Sausage Making Basics


There are a lot of resources available for the aspiring sausage maker. This will be a brief overview of the basics, best practices and key techniques. I highly recommend reading “Charcuterie: The Craft of Salting, Smoking and Curing” by Michael Ruhlman & Brian Polcyn. It’s an incredibly comprehensive book on technique with a great collection of recipes that serve as a foundation for many of our recipes.
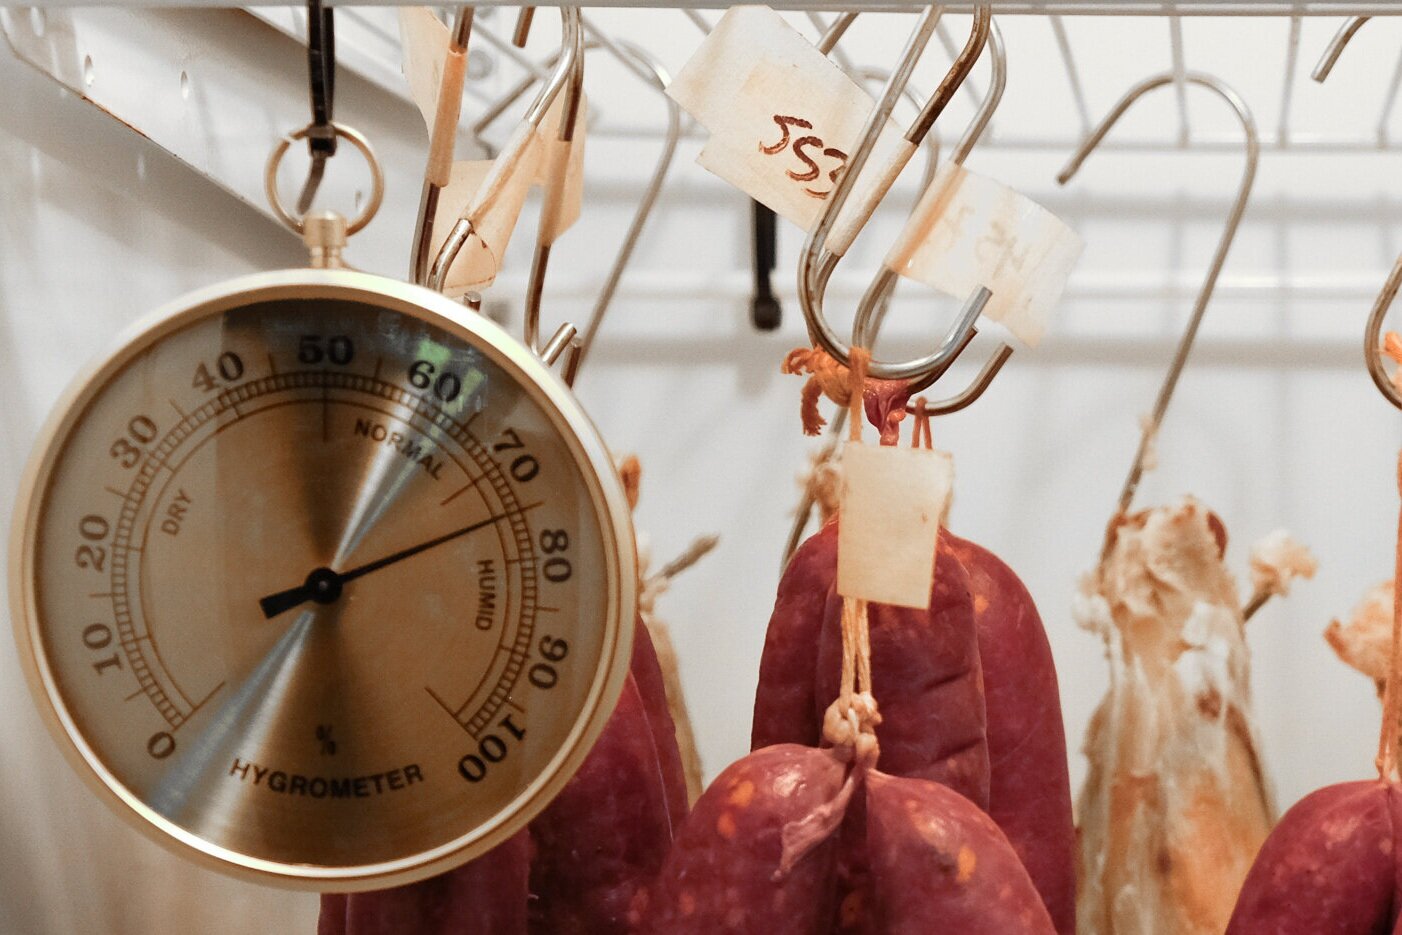
Before you get started on your first sausage recipe, there are a few general tips to keep in mind. This guide applies to both fresh and fermented sausages, but if you’re considering making a fermented sausage, please see our primer on curing meat. Cured meats and sausages require a bit more in-depth knowledge than fresh sausage.
THE BASICS
Work clean- This may seem obvious but it is extremely important. Ground and chopped meats have exponentially more surface area than whole muscle cuts. The increased surface area means more opportunity for contamination, as well as the risk of spreading a small contamination throughout the entire batch.
Sausage making equipment often involves o-rings, threads and worm gears. These surfaces need to be cleaned thoroughly. Again, a small contamination can ruin an entire batch. That being said, sanitation with sausage making is no different than most other meat preparation. Keep your work surfaces clean, thoroughly sanitize your equipment, wash your hands, and you’ll be set.
Work cold- This is something that is repeated over and over by every reputable source and for good reason. Combining warm equipment, meat, and fat does not produce great results. Often, recipes will call for using a wooden spoon to mix the meat. That’s because handling the meat with your hands transfers heat, which is what you want to avoid if at all possible.
Fat softens and smears when it is allowed to warm, which results in the fat getting pasty when it runs through the grinder and coating the meat, instead of remaining in defined chunks. I’ve made many batches of subpar sausage, especially smoked or cooked sausages, where the meat and fat were not kept cool enough and the grind turned out to be more of a paste. When I went to cook or smoke the sausages, the smear of fat rendered out and left the sausage dry, chalky, and crumbly. This is probably the most common issue I’ve encountered with homemade sausage and is also the most easily avoided.
Working cold also aligns with working clean. Keep meat and fat in the fridge or freezer, and work in small enough batches that the entire grinding step can be done in a timely manner. I put my grinder head in the freezer before I start measuring out ingredients. Mixing bowls and tubs can be set on ice. Often, if there is room, after cutting meat and fat to size for the grinder I’ll place it in the freezer for 20-30 minutes before grinding.
Work in percentages and by weight- As an American, I’ve seen a lot of resistance to recipes in metric. I understand that it is unfamiliar to many home cooks, but I cannot stress this enough- it makes everything so much easier. You can scale recipes up or down and calculate the exact percentage of seasoning you need. And when you’re dealing with nitrates, cultures and sugars for fermented sausages you don’t just want to get it right- you have to.
Once you get used to working with a metric scale, everything else seems foolish. It’s faster, more accurate, and my favorite thing- you can easily scale to the amount of meat on hand instead of conforming to the recipe size. It’s easy to buy a 6 lb pork shoulder at the store. It’s not so easy to shoot a deer that you know is going to have the right size shoulder for the recipe you have in mind. One of the beauties of wild game is the inherent variability between animals, but it doesn’t make it easy to scale out a sausage recipe written out in ⅛ teaspoons.
So buy a kitchen scale and weigh out your ingredients. Our sausage recipes are written in percentages. Weigh the meat you would like to grind. If you have 2000 g of venison, and the recipe calls for 30% pork fat, multiply 2000 x .30 = 600 g pork fat. Try that with a recipe that calls for ⅛ of anything.
On meat and fat- Most fresh sausage will require the addition of fat if you’re using wild game. Beef or pork fat are the most common additions, and they’re readily available and affordable. Whatever fat you use, the ratio of lean meat to fat is a personal preference much like salt. I prefer fresh sausage with at least 4:1 (20% fat) ratio of meat to fat, usually closer to 3:1 (25%), and in some cases 2:1 (33%). We buy our pork fat from a local butcher that sources from local farmers. If you don’t have access to a good butcher or meat counter, try online.
Have fun- Sausage making can be daunting when you’re just getting started, but remember it’s not much different than making meatballs or burger patties. There are some extra steps, but have fun with it. You can put almost anything you want in a fresh sausage, just taste test as you go and adjust the recipe to fit your style.

EQUIPMENT:
At its core, all you absolutely have to have is a grinder. I don’t want anyone walking away from this thinking that they have to spend a whole ton of money to start making sausage. All you need to start out right is a small kitchen scale to weigh out ingredients and a stand mixer with a grinder attachment. That being said, we’ve spent years making sausage with undersized grinders and cheap stuffers, and it is a hassle working with the wrong equipment. In my opinion, if you don’t want to buy a dedicated sausage stuffer, don’t bother casing the sausage. Loose sausage tastes great and running the ground meat through the auger of a KitchenAid attachment a second time and through the stuffer tube usually doesn’t yield great results.
That being said, a KitchenAid grinder attachment works fine for small batches- we still have and use ours occasionally. But a stand-alone grinder (we use a Weston Pro Series) will make much quicker work of a pile of trim, and with a two speed stuffer, the entire grind, mix, and stuff process take less time than cleaning and cooling the equipment.
A stand mixer with a paddle attachment for mixing the ground meat is also a huge time saver, and will help you yield better results. Working the meat rapidly will both evenly distribute the seasoning as well as form a sticky bond that will hold sausage together.
Sausage making can be intimidating, and I don’t want to add to that intimidation by insisting you have all the “right” equipment to get started. Like I said, the one thing you absolutely have to have is a grinder, and a stand mixer attachment will do the job just fine, albeit slowly. That being said, if you find that you enjoy making sausage and want to devote a little more time and energy into it, having the proper equipment is crucial. I am going to speak from my own mistakes here- if you’re going to buy anything, buy the good stuff. Replacing broken and inadequate vacuum sealers, grinders, and sausage stuffers, we have spent more than double, and possibly even triple, what we would have on the right equipment in the first place.
If you’re just getting started and have a stand mixer grinder attachment, that’s great! It’ll be a little slow at grinding but will get the job done. You can also use it to stuff cased sausages, but you’re going to get some fat smearing, and so the next piece of equipment you’ll be looking at buying is going to be a dedicated sausage stuffer. We bought a cheap-ish store-brand sausage stuffer, but after one or two uses, the shaft started bending (or maybe it was never completely straight to begin with). Every subsequent batch became more and more difficult to process as the shaft continued to bend with use. It got to the point where one of us had to stand on a stepladder in order to get enough leverage to turn the crank, and we had to clamp the whole thing to the countertop because of the amount of force we were having to use to crank it. It took all the fun out of making sausage and we didn’t do another cased sausage for two years because we hated using the damn thing but didn’t want to throw it out because we had paid decent money for it. Don’t be like us. Now, we have a Weston two-speed sausage stuffer and it is AWESOME. This thing cranks like butter and is built to last. We’ve been churning out cased sausages since we got it, and it’s completely painless to use. I wish we had never thrown away the $120 on the last stuffer and just bought this to start. I can only imagine how much cool stuff we would have made.
Once you have your dedicated sausage stuffer, you’re going to be able to work so fast that you’ll start looking to upgrade your grinder. Here’s another cautionary tale about buying cheap equipment. Again, we bought a cheapish grinder- I think it was from Gander- and again, we had equipment failure almost immediately. The first few uses were fine, but one night we started hearing a horrible grinding noise and within seconds the entire thing was inoperable. It was either a burr or an unscrewed part, but something came loose and completely wrecked the motor. I want to emphasize this point because I wish I had internalized it sooner- don’t buy the cheap gear. It is always more expensive in the end. Every dollar we spent on the cheap grinder wound up in the garbage within months. We went back to the kitchenaid grinder for a few years, but eventually we wound up with a Weston grinder, and it is powerful, efficient and maybe just a little loud, but we love it. It has handled everything we’ve put through it without even breaking a sweat, and it’s very obviously well made.
Got all that? If so, check out our primer on how to grind & stuff sausage below:
RECOMMENDED READING
We field a lot of questions about the sausage and charcuterie making process. One question that always comes up is what books we recommend to learn more about the processes. This fortunately, is an easy question. Charcuterie by Ruhlman and Polcyn has all the fundamentals you need to cure meats and develop your own sausage recipes. It’s the first book we bought on the subject matter, and it’s still the one we go to the most when we want to cross reference an idea.
The Art of Making Fermented Sausages by the Marianski brothers is a deep dive into the process of making salami. This book gives you the information you need to make salami safely, and a deeper understanding of how salami works.
We highly recommend both books, but if you are just starting out and could only purchase one, start with Charcuterie.
Advertising disclosure: As an Amazon Associate I earn from qualifying purchases.


“Best sausage I’ve ever had”